

The hard part of AI anime is not the first good image. It is the second one. You write a careful prompt, get a character you love, then ask for the same character at a café and get someone with different eyes, a new hairline and a jacket that changed colour.
This happens because a text prompt is not an identity. Every generation redraws the character from words, and words leave a lot of room. The fix is to design the character once, turn it into reference images, and make every later image from those references.
This guide walks through that process in Morphed's Characters, with the prompts and credit costs for each step. Every image and the clip below come from one run of it: a character called Mika, made on Morphed on September 29, 2026, without retouching.
The Short Version
- Design: new character, Style set to Anime, a concrete description, then 1–4 portrait options.
- Lock: pick a portrait and save it. Morphed draws a main image and a character sheet (front, three-quarter, profile).
- Use: write scenes on the character's page, or mention
@handlein any image prompt. - Animate: open an image and choose Animate, or mention
@handlein Video with a model that takes reference images.
Why Anime Characters Drift
Anime designs look simple, which makes drift more obvious, not less. A face is a few lines, so a small change in eye shape or fringe reads as a different person. Three things cause most of it:
- The prompt is the only memory. Without a reference image, the model has nothing to copy, only words to reinterpret.
- Vague traits. "Cute girl with dark hair" fits thousands of designs. The model picks a new one each time.
- Style words fighting identity. Changing "90s cel anime" to "modern key visual" between prompts changes the face along with the lighting.
A reference sheet solves the first problem, and a good description solves the second. Keeping one style line solves the third.
Step 1: Design the Character
Go to Characters, choose New character, and stay on the Describe tab.
- Style: choose Anime. This sets how the portrait, the main image and the sheet are drawn.
- Describe them: this matters most. See the template below.
- Basics (optional): gender, age, heritage and build. Leave them empty if your description already covers them.
- Portraits to pick from: 1, 2 or 4. Each costs 12 credits. Four is worth it for a first character, because picking is easier than re-prompting.
A description template that holds up
Write the traits a viewer would use to recognise the character from across a room. Put them in this order:
- Hair: shape, length, colour, one distinctive detail ("choppy silver bob, one braid behind the left ear").
- Eyes: colour and shape ("sharp amber eyes, slightly upturned").
- Signature item: one thing they always carry or wear ("red scarf with frayed ends").
- Outfit and palette: two or three colours ("navy school-style blazer, white shirt, red accents").
- Style line: one phrase for the look ("clean cel shading, bold ink lines, flat colour").
Three examples you can adapt:
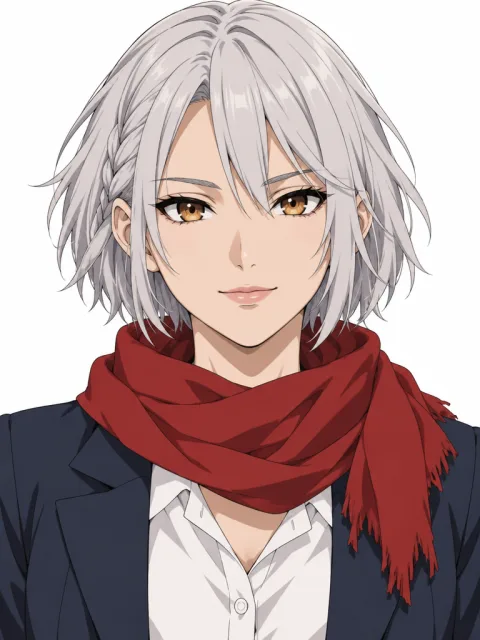
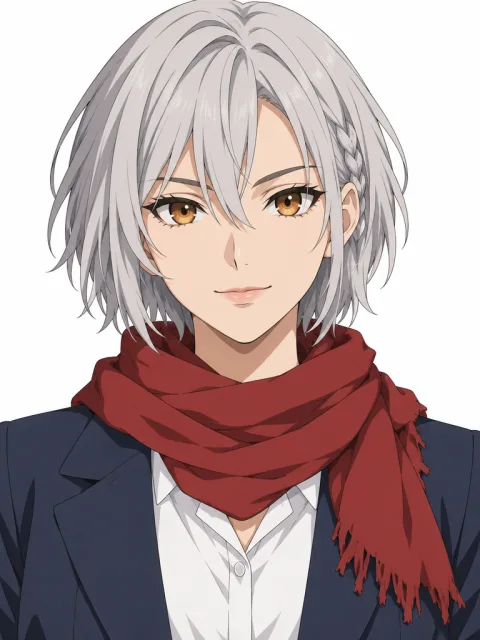
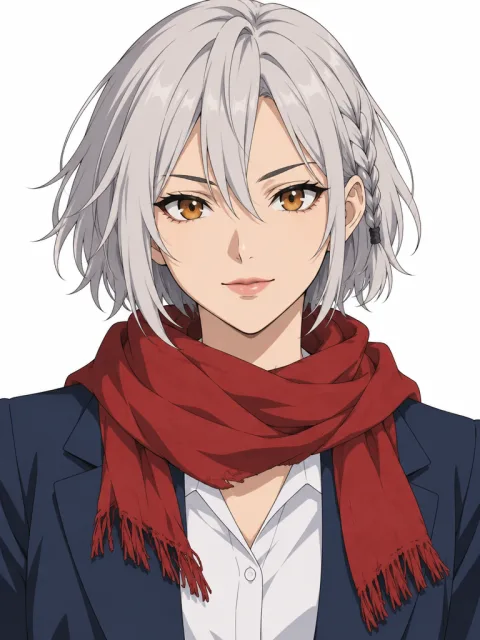
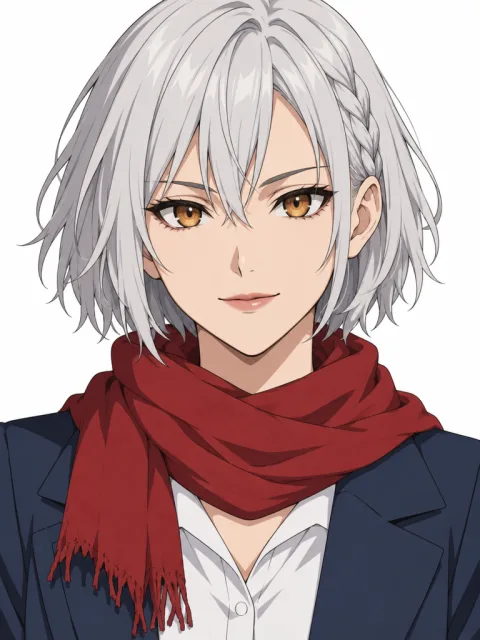
Choppy silver bob with one small braid behind her left ear, sharp amber eyes, a red scarf with frayed ends, navy blazer over a white shirt, clean cel shading with bold ink lines and flat colour.
Messy black hair with a single white streak, tired grey eyes, a cracked visor pushed up on his forehead, oversized olive bomber jacket with orange patches, modern shonen style with crisp linework.
Long teal hair in a high ponytail tied with a gold ring, bright violet eyes, a small star-shaped hair clip, cream cardigan and pleated black skirt, soft 90s cel animation look with muted colours.
Characters on Morphed are adults: the youngest age option is 20s.
Press Create portraits, then pick the one that feels most like the character. If none land, change one trait at a time and press Create new portraits.
Here are the four options for the first example description, with Anime, Woman and 20s selected. All four follow the brief. We picked option 3 because the braid behind her left ear reads most clearly.
Step 2: Lock It with a Main Image and a Character Sheet
Name the character and save. Morphed now draws two images with GPT Image 2.5 Sunburst at high quality, 80 credits in total:
- Main image: head and shoulders, facing the viewer, on white, in a plain top so the face carries the identity.
- Character sheet: the same character three times, in front, three-quarter and profile views.
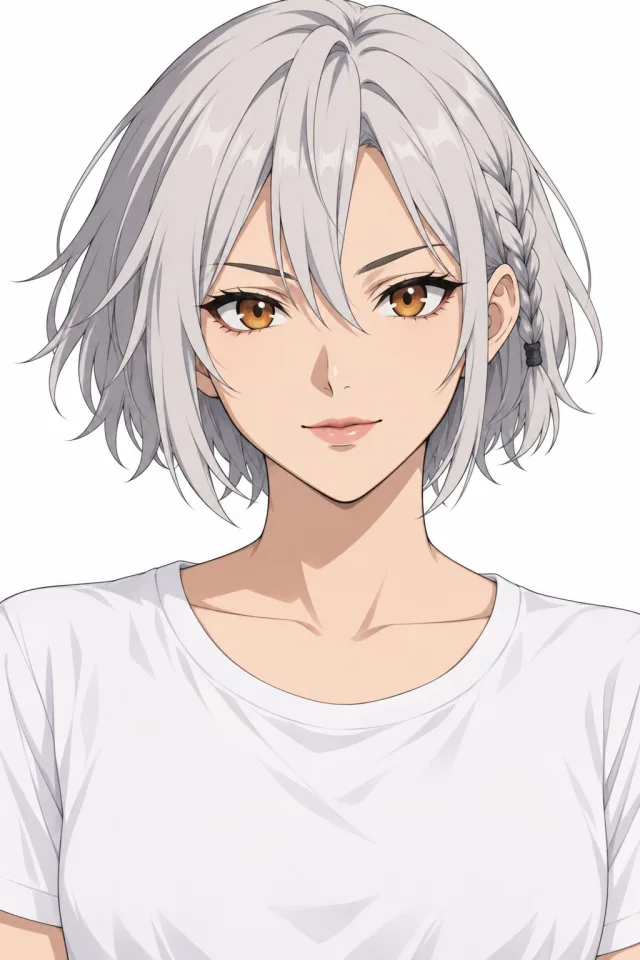
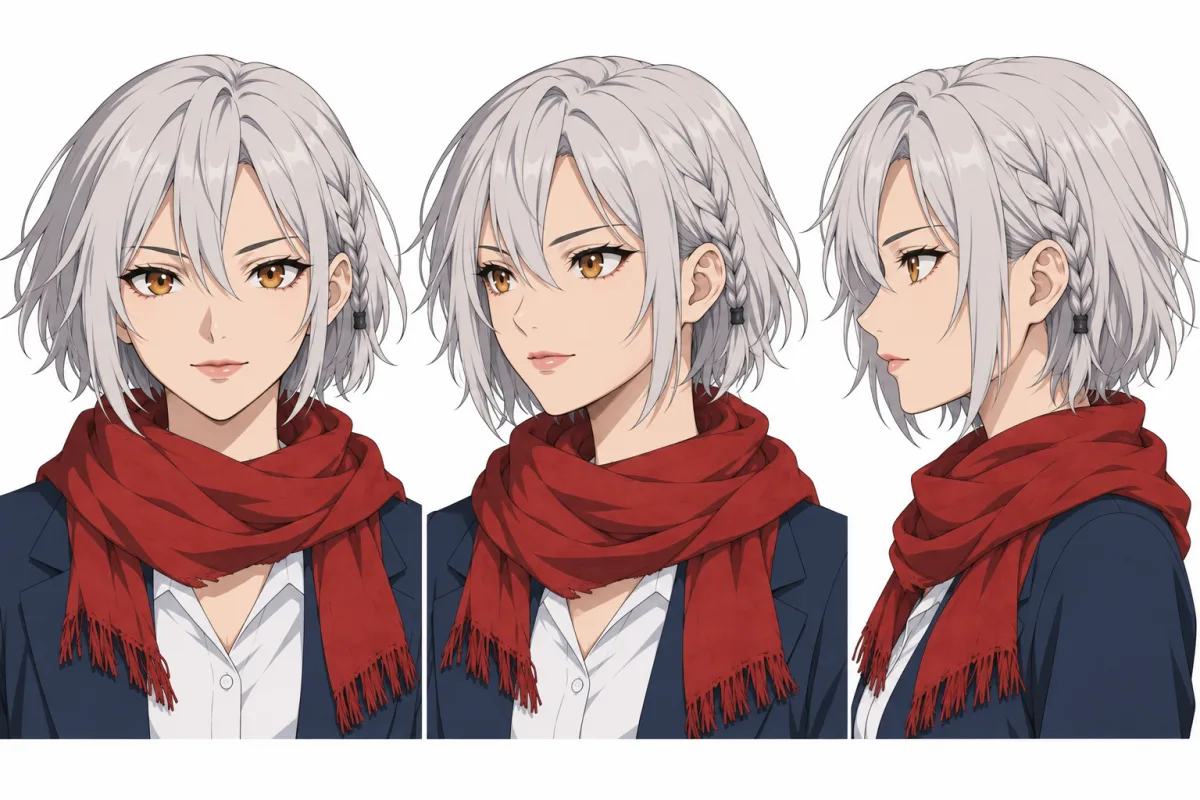
Setup takes about a minute. From then on, these two images are the character. Every scene sends both as references, and the scene prompt tells the model to keep the same face, hair and rendering style. That is why an anime character stays drawn instead of drifting toward a photo.
Look at the sheet before you make scenes. If the profile shows a different fringe or ear detail from the front view, fix it now: add a source image, or use Recreate to redraw the main image and sheet. Every later image inherits whatever the sheet shows.
Because the main image drops the outfit, name the signature item in your scene prompts. The sheet carries it, and the prompt makes sure it shows up.
Step 3: Put the Character in Scenes
Open the character's page. The Scene box asks where they are, what they are doing and what they are wearing, so answer those three questions.
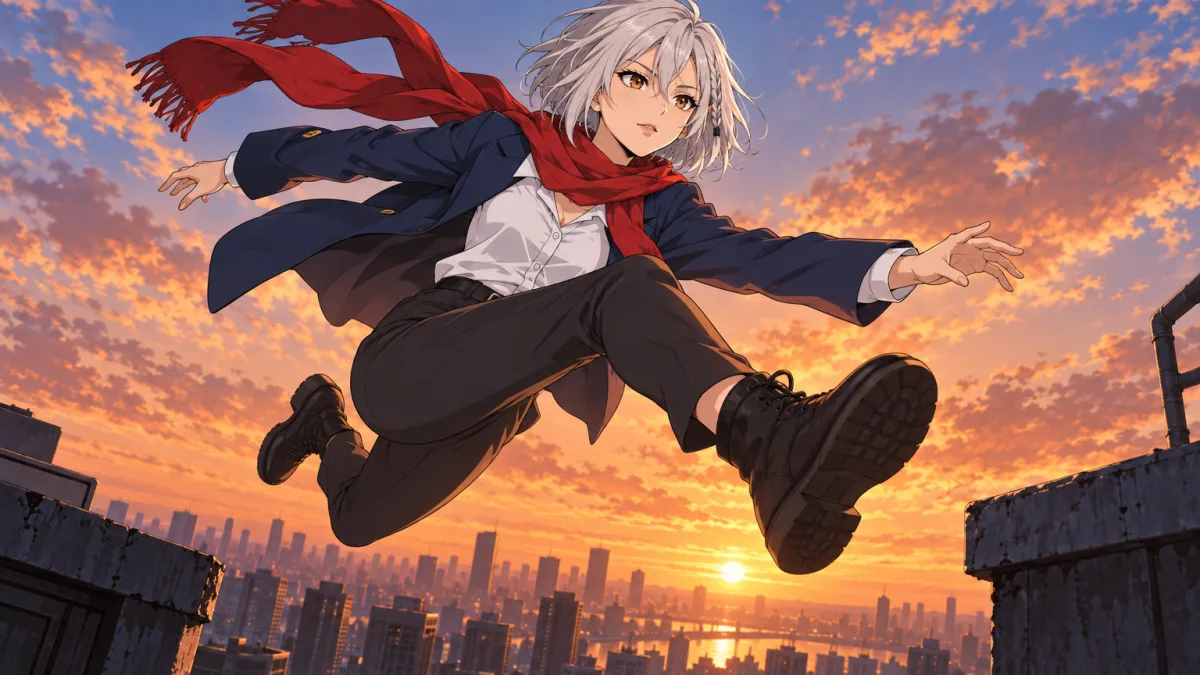
These are the exact prompts behind the three scenes below, each at High quality. Each one ends with the same style line, so the look stays fixed while the scene changes.
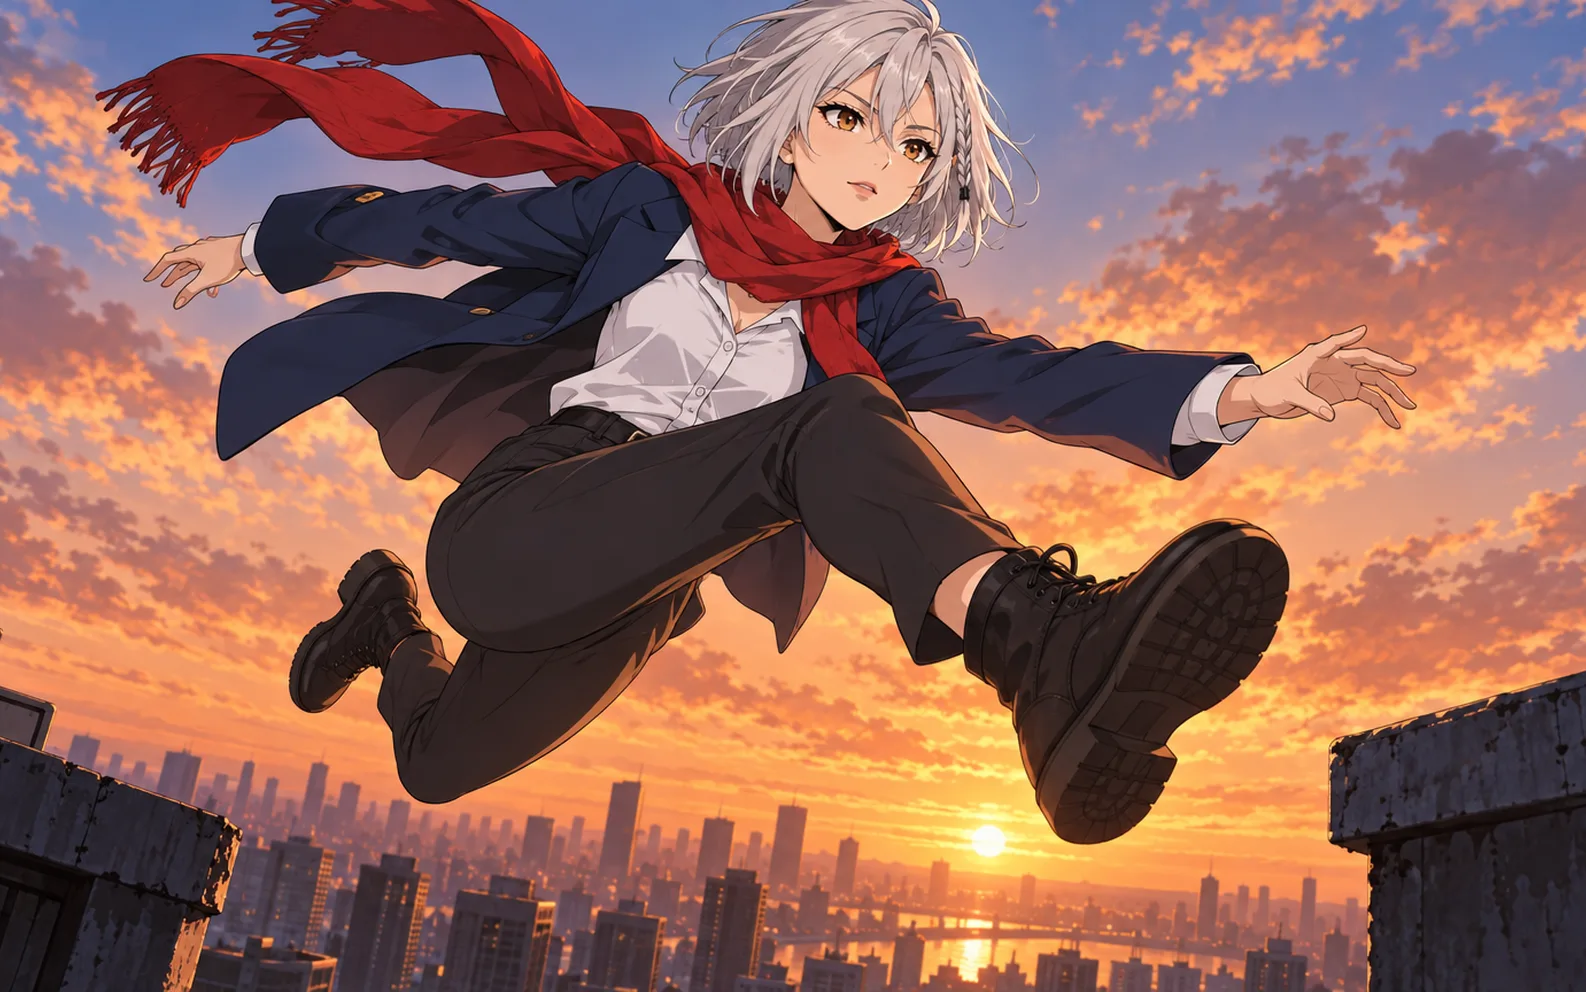
Mid-jump across a rooftop gap at sunset, red scarf trailing behind her, navy blazer flaring, city skyline far below, dynamic low angle, clean cel shading with bold ink lines.
At a rainy bus stop at night, holding a clear umbrella, looking back over her shoulder, red scarf and navy blazer, neon signs reflecting on the wet street, clean cel shading with bold ink lines.
Sitting at a cluttered workbench in a small repair shop, soldering a tiny robot, focused expression, warm desk lamp light, red scarf loosened around her neck, blazer sleeves rolled up, clean cel shading with bold ink lines.
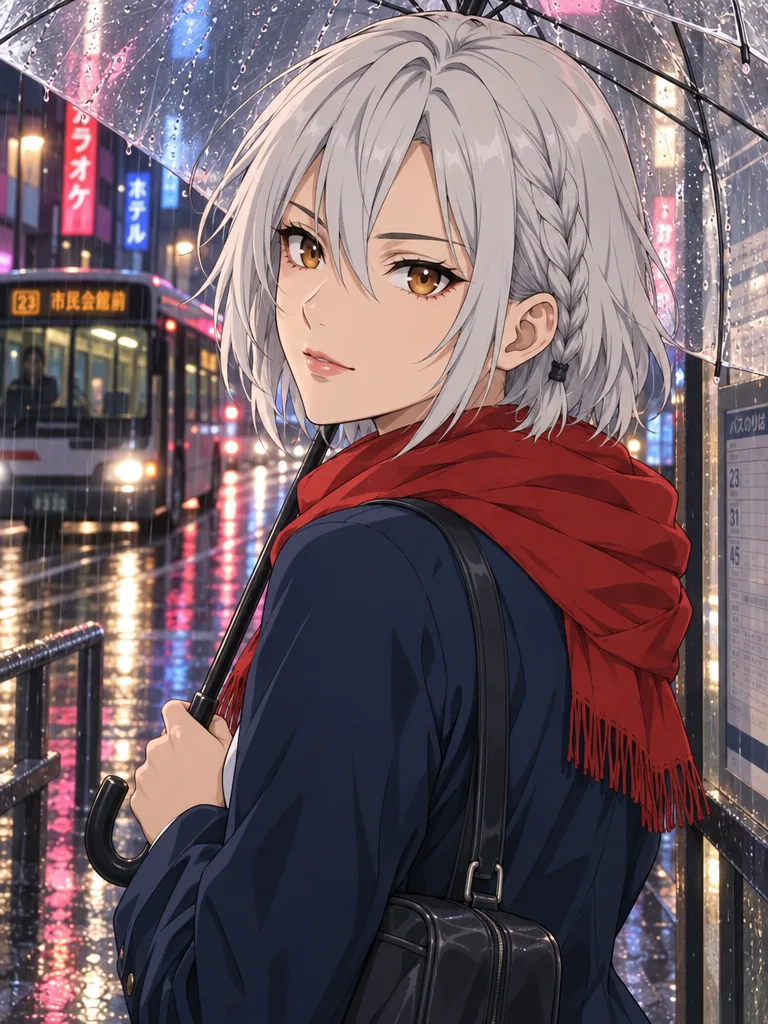
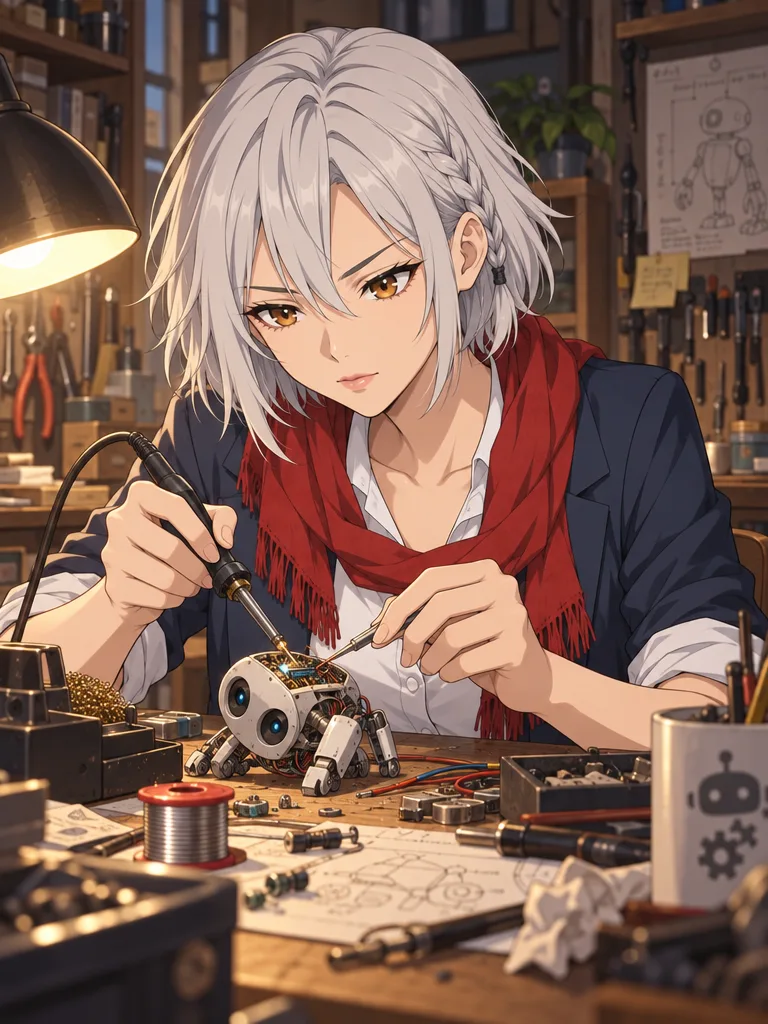
Across all three, the face, the silver bob, the braid behind her left ear and the amber eyes stay the same. So do the scarf and blazer, because the prompts name them.
Tips that keep scenes on model:
- Keep the signature item in the prompt unless you mean to remove it. It is the fastest thing for a viewer to recognise.
- Change one big thing at a time. A new outfit and a new art style in the same scene is where identity slips.
- Standard for exploring, High for keepers. A scene costs 12 credits at Standard and 40 at High. The examples in this guide are High.
You can also use the character outside its page. In Create, type @ and the character's handle in any image prompt. Up to four characters can appear in one generation, so two OCs can share a scene.
Step 4: Animate the Character
There are two ways to get the character into video.
From an image (most control). Open any image of the character and choose Animate. The image becomes the first frame, so the design is exact at frame one, and your prompt only has to describe motion: "she turns toward the window, hair drifting, petals falling past." One action per shot keeps the linework steady.
Animate opens Video with the image already set as the start frame. Check the model before you generate, because the default may not be the one you want. This clip uses MiniMax H3 Max at 768p, 5 seconds with sound, for 65 credits, with this prompt:
She slowly turns her head toward the camera and gives a small smile, rain falling steadily, neon reflections rippling on the wet street, her scarf moving slightly in the wind, the bus pulling away behind her. Calm locked camera. 2D anime, cel shaded, clean ink lines, no photorealism.
The linework and the design hold through the whole clip. There is no drift toward a photoreal face, and the braid, eyes and scarf match the still.
From references (no start frame). In Video, mention @handle in the prompt. This needs a model that accepts reference images:
| Model | Reference images | Clip length | Credits per second |
|---|---|---|---|
| MiniMax H3 | up to 9 | 5–15 s | 40 |
| MiniMax H3 Max | up to 9 | 5–15 s | 8 (480p) · 13 (768p) |
| WAN 3.0 | up to 10 | 2–30 s | 8 (480p) · 16 (720p) · 31 (1080p) |
| Gemini Omni Flash 1.1 | up to 10 | 3–10 s | 5 (360p) to 43 (4K) |
| Kling V3 Pro | up to 4 | 3–15 s | 18 · 26 with sound |
Seedance models can't use characters: Morphed blocks the mention because Seedance rejects faces taken from reference photos.
For a short scene, make the keyframes as images first, animate each one, then cut them together in the Video Editor. Our anime video guide covers that workflow shot by shot.
Starting from Your Own Photo
To build an anime version of yourself, do it in two steps:
- Turn a clear, front-facing selfie into an anime portrait with the AI anime generator.
- In Characters, choose New character, then From photos, and upload that anime portrait (up to four images).
The main image and the sheet are drawn in the style of what you upload, so an anime source gives you an anime character. Only upload photos of yourself or of people who agreed to it.
What It Costs
| Step | Credits |
|---|---|
| 4 portrait options | 48 |
| Save the character (main image + sheet) | 80 |
| 10 scenes at Standard quality | 120 |
| One 5-second clip on MiniMax H3 Max at 768p | 65 |
| Total for a first character with 10 scenes and a clip | 313 |
The Mika example above cost 313 credits too: 48 for portraits, 80 for setup, 120 for three High scenes and 65 for the clip.
The Basic plan includes 650 credits a month. Plans start at $9/month, with 30% off your first 3 months.
What Still Goes Wrong
- Tiny details drift first. Earrings, logos and patterned fabric change between scenes more than hair or eye colour does. Make signature details big and simple.
- Busy scenes compete with the face. In crowd shots and wide shots the face is small, and the model has less to hold on to. Use medium shots for important moments.
- Existing characters get refused. Some models block copyrighted characters. Design original ones; it also makes the character yours to use.
Frequently Asked Questions
How do I keep an anime character consistent across images?
Create the character once as a main image and a character sheet, then make every scene from those references instead of re-describing the character. On Morphed that is Characters with the Anime style.
What is the best AI for anime characters?
For designing and reusing one character, a model that edits from reference images works better than prompting from text alone. Morphed's Characters uses GPT Image 2.5 Sunburst for the portrait, the sheet and every scene. See how GPT Image 2.5 compares in our 48-image comparison.
Can I use my anime character in videos?
Yes. Animate any image of the character, or mention it in Video with a model that takes reference images. Seedance cannot use characters.
How many characters can I put in one image?
Up to four, by mentioning each one's handle in the prompt.
Design your first anime character, then take it into any scene or video. Start creating on Morphed →
Related: AI Anime Generator | Best AI Video Generators for Anime | Anime Prompts | AI Anime Video Generator