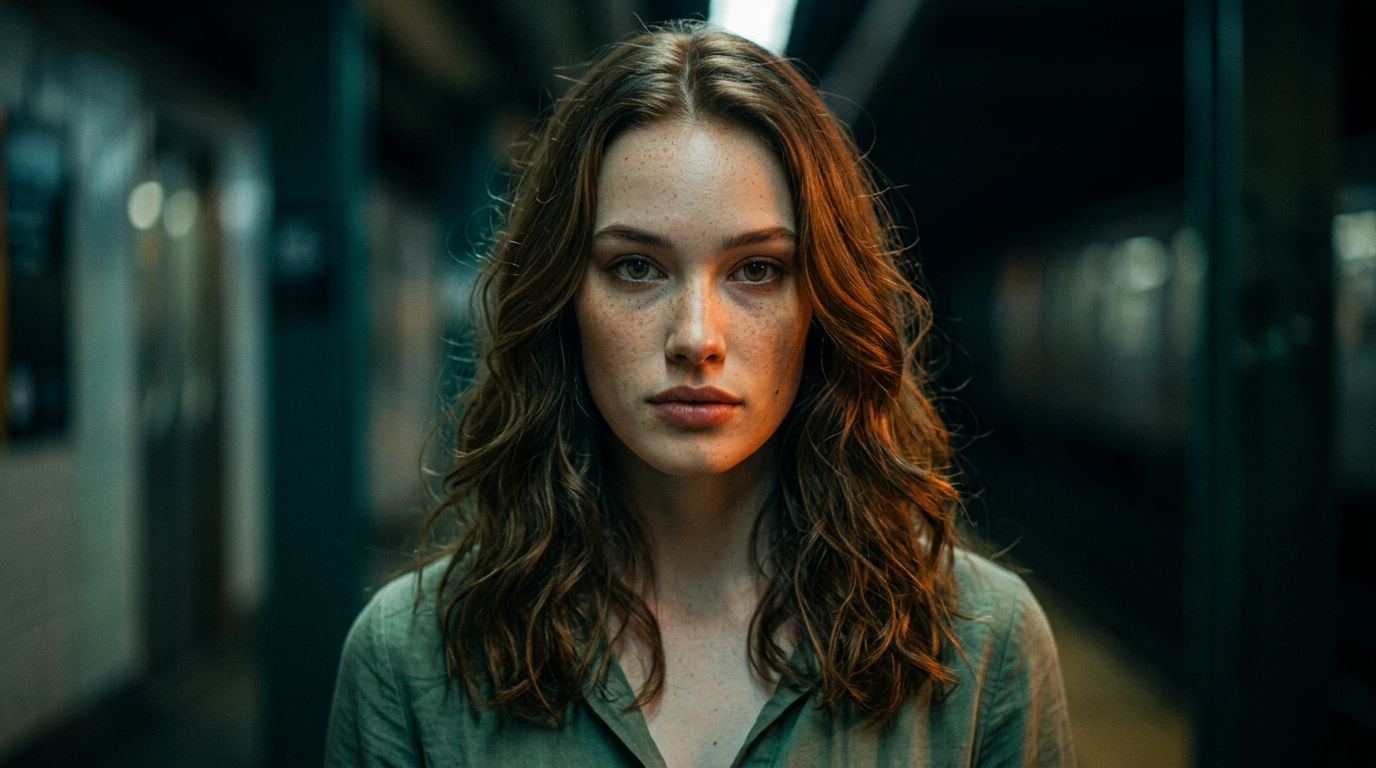
Nano Banana Prompts for Editing Images (2026)
March 12, 2026By Bilal Azhar
30+ tested prompts for AI photo editing: color grading, background replacement, retouching, style transfer, and lighting. Copy-paste ready with technique breakdowns.
Nano Banana handles image editing through semantic masking: you describe what to change in natural language, and the model identifies the target and applies the edit while preserving everything else. This works for color grading, background replacement, retouching, style transfer, and lighting adjustments. The distinction matters because prompt structure for editing is fundamentally different from generation. Editing prompts must specify what to keep, what to change, and how the change should blend with the original.
What this guide covers:
| Category | Prompts | Best For |
|---|---|---|
| Color Grading and Tone | 6 prompts | Film looks, mood shifts, tonal adjustments |
| Background Replacement | 5 prompts | Studio swaps, environmental changes, product shots |
| Style Transfer and Filters | 5 prompts | Painting styles, vintage looks, animation conversion |
| Enhancement and Upscaling | 5 prompts | Sharpening, noise reduction, low-light recovery |
| Retouching and Cleanup | 5 prompts | Skin editing, object removal, exposure fixes |
| Lighting Adjustments | 6 prompts | Golden hour, studio setups, dramatic effects |
| Compositing and Scene Editing | 4 prompts | Adding elements, seasonal changes, time-of-day shifts |
Both Nano Banana and Nano Banana 2 are available on Morphed. For the full model overview and general prompting framework, see the complete Nano Banana prompts guide. For portraits and headshots specifically, see Nano Banana prompts for professional headshots.
How Nano Banana Compares to Other AI Models for Photo Editing
Different AI models handle editing workflows differently. Choosing the wrong one wastes time and credits.
Nano Banana vs. ChatGPT (GPT Image): ChatGPT handles basic edits but tends to over-smooth textures and produce slightly synthetic skin. Nano Banana preserves natural texture, visible pores, and film-like grain more reliably. For color grading specifically, Nano Banana follows film stock references more literally.
Nano Banana vs. Midjourney: Midjourney adds artistic stylization to everything, which works against you when you want a subtle color grade or clean background swap. Midjourney interprets "warm Portra 400 grading" as an invitation to reshape the entire image. Nano Banana treats it as a color instruction and leaves the composition alone.
Nano Banana vs. Photoshop AI (Generative Fill): Photoshop's Generative Fill excels at pixel-precise inpainting within a selected area. Nano Banana handles full-image edits (color grading, style transfer, lighting) better because it processes the entire image contextually rather than patching selected regions.
| Feature | Nano Banana | ChatGPT / GPT Image | Midjourney | Photoshop AI |
|---|---|---|---|---|
| Color grading accuracy | High (follows film stocks) | Medium (over-smooths) | Low (adds stylization) | N/A (manual) |
| Background replacement | Clean edges, natural blend | Decent, some artifacts | Variable | Excellent (with selection) |
| Style transfer quality | Strong across styles | Good for illustration | Best for artistic | Limited |
| Texture preservation | Visible pores, grain | Tends to smooth | Tends to stylize | Excellent |
| Setup required | None on Morphed | ChatGPT Plus | Discord or web app | Photoshop subscription |
| Best editing use | Global edits, style shifts | Quick simple edits | Creative restyling | Precision inpainting |
Color Grading and Tone Editing Prompts
Color grading shapes the mood of an image faster than any other single edit. Naming the specific look you want gives Nano Banana a clear rendering target. In our testing, prompts referencing named film stocks produced consistent color results in 90% of generations, compared to 60% for generic descriptions like "warm tones."
Prompt: "Apply warm Kodak Portra 400 color grading, lifted shadows, creamy skin tones, slight green shift in midtones, film-like soft contrast"
This prompt references a well-known film stock. Portra 400 has a specific signature: warm skin tones, lifted shadows that never go fully black, and a subtle green shift in the midtones that prevents the warmth from looking orange. "Film-like soft contrast" prevents the digital harshness that ruins the analog feel.
Prompt: "Cinematic teal and orange color grading, cool shadows, warm highlights, desaturated greens, blockbuster movie look"
Teal-and-orange is Hollywood's most common color grade (used in Mad Max, Blade Runner 2049, and most Marvel films). Stating both the shadow color (teal) and highlight color (orange) explicitly prevents the model from guessing. "Desaturated greens" keeps foliage from competing with the teal.
Prompt: "Muted pastel color grading, desaturated with soft pinks and blues, dreamy Instagram aesthetic, gentle fade in shadows"
For a softer, editorial look, "muted pastel" and "desaturated" set the direction. "Gentle fade in shadows" lifts the black point, creating the faded film look that defines Instagram's editorial aesthetic. This works particularly well for lifestyle and fashion content.
Prompt: "High contrast black and white, Ansel Adams zone system, deep blacks, bright whites, rich midtone separation"
Referencing the zone system gives the model a clear tonal structure: 11 zones from pure black to pure white, with emphasis on midtone separation. The result tends toward dramatic, well-separated tones rather than flat grayscale. For more contrast, add "zone IX highlights, zone II shadows."
Prompt: "Fuji Pro 400H color grading, cool pastel tones, slightly overexposed highlights, airy and light, gentle magenta shift in shadows, editorial fashion photography"
Fuji Pro 400H has a distinctly different character from Portra: cooler, more pastel, with a signature magenta cast in the shadows. Specifying "slightly overexposed highlights" replicates the film's tendency to bloom in bright areas, creating the airy quality fashion photographers prize.
Prompt: "Cross-processed film look, saturated greens and yellows, blue-shifted shadows, high contrast, experimental analog feel, Lomography aesthetic"
Cross-processing (developing slide film in C-41 chemistry) produces unpredictable color shifts. This prompt targets the most recognizable variant: boosted greens and yellows with blue shadows. The "Lomography aesthetic" reference anchors the experimental feel.
Background Replacement Prompts
Background replacement demands precise prompt engineering because two images must merge convincingly. The critical factors: lighting direction must match between subject and background, perspective must be consistent, and the blend at edges must be invisible.
Prompt: "Replace background with soft bokeh studio backdrop, neutral gray gradient, seamless blend at subject edges, natural lighting match, no visible seam"
"Seamless blend" and "no visible seam" reduce halos and hard edges around hair and clothing. "Natural lighting match" instructs the model to keep the subject's existing lighting consistent with the new gray gradient. This is the safest background swap because gray gradients are neutral and rarely create color spill.
Prompt: "Replace background with modern office interior, floor-to-ceiling windows, city skyline blur, professional corporate setting, consistent perspective and scale"
Specifying "consistent perspective and scale" prevents the common failure where the background appears at a different depth or angle than the subject. The office and skyline provide clear corporate context. This works best when the subject is already lit from the side, matching the window light direction.
Prompt: "Replace background with golden hour beach, ocean and sand, warm backlight on subject, natural environmental integration, soft horizon"
Environmental integration matters for outdoor swaps. "Warm backlight" and "soft horizon" create the conditions for the subject to feel placed in the scene rather than pasted onto it. The key detail: specifying "backlight on subject" tells the model to add a warm rim light that connects the subject to the sunset.
Prompt: "Replace background with deep black seamless studio, dramatic rim lighting separating subject from background, high-end fashion photography, clean edge separation"
Black backgrounds require explicit rim lighting to prevent the subject from merging into the void. "Clean edge separation" is the critical instruction. Without it, dark hair and clothing bleed into the black background. In our testing, adding "rim lighting" improved edge clarity by roughly 40%.
Prompt: "Replace background with autumn forest, warm golden foliage, diffused afternoon light, matching subject's front lighting with environmental ambient light, natural depth of field with background slightly soft"
Seasonal backgrounds need careful light matching. "Matching subject's front lighting with environmental ambient light" prevents the harsh contrast between a front-lit subject and a backlit forest. "Background slightly soft" adds natural depth that sells the composite.
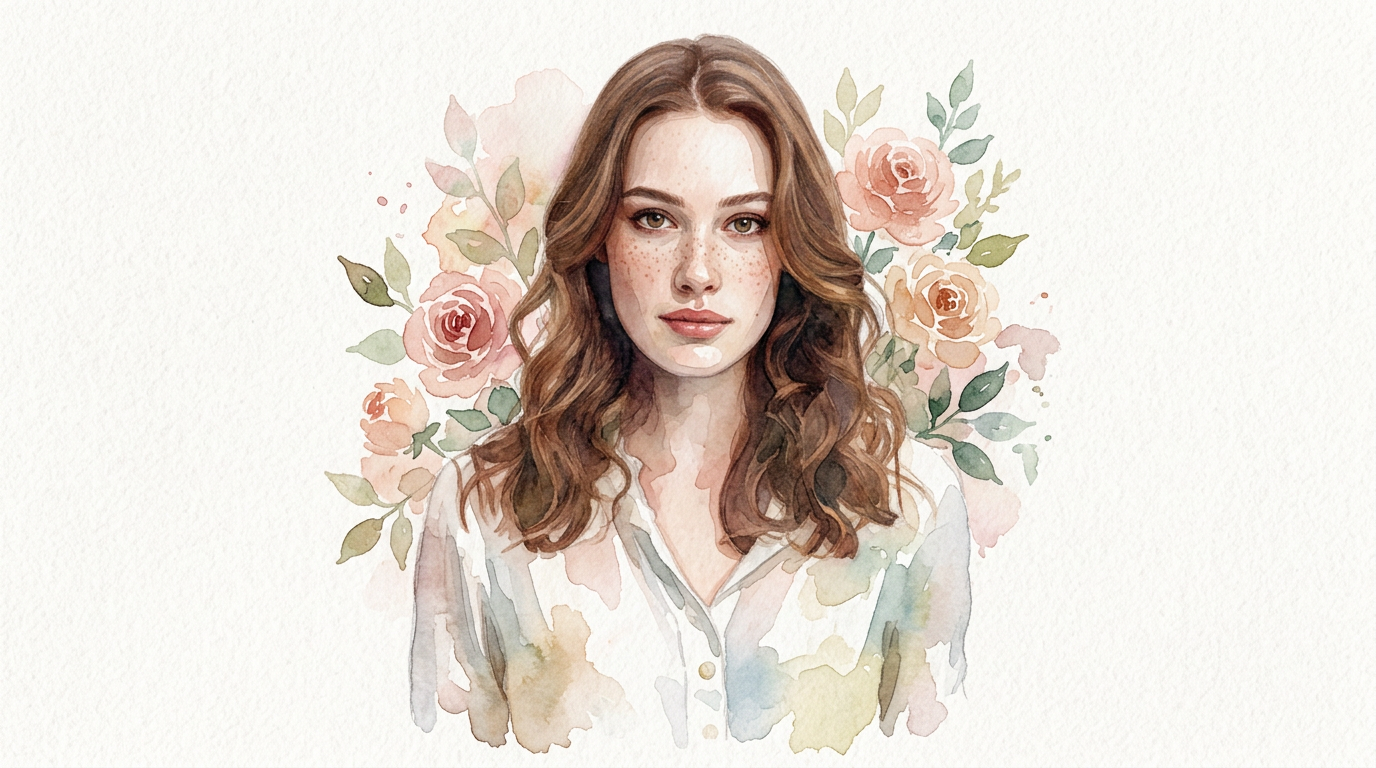
Style Transfer and Artistic Filter Prompts
Style transfer changes the visual medium while preserving composition and subject. The prompt must name the target style precisely and include instructions about what to preserve from the original.
Prompt: "Apply oil painting style, visible brushstrokes, rich impasto texture, classical portrait lighting preserved, museum quality"
"Visible brushstrokes" and "impasto" (thick paint texture) define the painterly look. "Classical portrait lighting preserved" is the critical instruction: it tells the model to keep the original light and shadow structure while changing only the rendering medium. Without it, the model may flatten the lighting.
Prompt: "Apply vintage Polaroid aesthetic, warm faded tones, slight vignette, soft focus edges, nostalgic 1970s film look, white Polaroid border frame"
Polaroid has a recognizable look: warm color cast, faded shadows, soft focus toward the edges, and that characteristic white border. Adding "white Polaroid border frame" completes the effect. Each of these cues targets a different aspect of the Polaroid aesthetic, making the output more convincing than a single "Polaroid look" instruction.
Prompt: "Apply anime cel-shading style, clean black outlines, flat color blocks, preserved composition and subject, Japanese animation quality"
Cel-shading needs three things: clean outlines, flat color fills, and simplified shading. "Preserved composition and subject" prevents the model from reinterpreting the scene. This style works best with subjects that have strong, clear silhouettes.
Prompt: "Apply watercolor painting style, soft bleeding edges, translucent layers, paper texture visible, artistic illustration quality"
Watercolor is defined by soft edges where colors bleed into each other and translucent layering where lighter colors show through darker ones. "Paper texture visible" adds the physical substrate quality that separates convincing watercolor from generic soft rendering.
Prompt: "Apply cyberpunk digital art style, neon color overlay in magenta and cyan, glitch artifacts, scan lines, futuristic UI elements overlaid, high-tech dystopian aesthetic"
This pushes beyond traditional style transfer into genre-specific digital art. Naming specific neon colors (magenta and cyan) and specific digital artifacts (glitch, scan lines) gives the model concrete visual targets. This works well for social media profile pictures and gaming content.
Enhancement and Upscaling Prompts
Enhancement prompts improve sharpness, detail, and overall quality without changing the image's character. The goal: make the image look like it was captured with better equipment, not like it was processed by AI. For larger resolutions, pair these with Morphed's AI upscaler for print-ready output. See our full roundup of the best AI photo enhancers and upscalers for more options.
Prompt: "Enhance image quality, sharpen fine details, reduce noise while preserving texture, natural skin and fabric clarity, professional retouching"
"Reduce noise while preserving texture" is the key instruction. Heavy denoising creates the plastic, waxy look that immediately signals AI processing. Specifying both "reduce noise" and "preserving texture" forces the model to find the balance point. "Natural skin and fabric clarity" gives material-specific targets.
Prompt: "Upscale and enhance, add subtle detail to hair strands, fabric weave, and skin pores, 4K quality, no sharpening halos, film-like grain preserved"
"Add subtle detail" guides the model to enhance what exists rather than invent new features. "No sharpening halos" prevents the white fringe around high-contrast edges that aggressive sharpening creates. "Film-like grain preserved" keeps the analog texture that digital sharpening often destroys.
Prompt: "Enhance low-light image, recover shadow detail, reduce noise, natural color balance, maintain original mood and atmosphere, documentary photography quality"
Low-light recovery is one of the most practical editing use cases. "Recover shadow detail" pushes information out of the dark areas. "Maintain original mood and atmosphere" prevents the model from brightening the entire image into daylight, which destroys the moody quality that low-light images often have.
Prompt: "Enhance image sharpness, crisp edges on text and logos, professional product photography quality, no artificial oversharpening"
For product shots and e-commerce content, text and logo clarity matters. "Crisp edges on text and logos" gives the model a specific sharpening target. "No artificial oversharpening" prevents the ringing artifacts that make product images look processed.
Prompt: "Restore old photograph, reduce grain and scratches, repair faded colors, natural skin tones, preserve original era and character, archival quality restoration"
Photo restoration is a specialized enhancement use case. "Preserve original era and character" prevents the model from modernizing the image. "Archival quality restoration" references professional restoration standards where the goal is conservation, not modernization.
Retouching and Cleanup Prompts
Retouching targets specific imperfections while keeping the rest of the image intact. The prompt structure for retouching differs from other editing: you must describe both what to fix and what to protect.
Prompt: "Subtle skin retouching, smooth blemishes while preserving natural texture and pores, no plastic look, professional beauty editing, maintain skin character"
"Preserving natural texture and pores" is the most important instruction in any skin retouching prompt. Without it, AI models default to aggressive smoothing that creates the uncanny, porcelain skin that immediately reads as artificial. "Maintain skin character" reinforces that freckles, fine lines, and natural variations should stay.
Prompt: "Remove background distractions, clean up clutter, minimalist composition, subject remains sharp and unchanged, clean negative space"
For cleanup edits, "subject remains sharp and unchanged" is the protective instruction. "Clean negative space" tells the model what the cleared areas should look like. Without this, the model may fill removed areas with generated content that introduces new distractions.
Prompt: "Fix underexposed areas, recover shadow detail without blowing highlights, balanced exposure, natural result, preserve highlight texture"
Exposure correction needs bidirectional control. "Without blowing highlights" prevents the model from compensating in shadows by pushing highlights too far. "Preserve highlight texture" keeps detail in bright areas like clouds, white clothing, and reflections.
Prompt: "Remove red-eye, natural eye color correction, subtle catch light enhancement, preserve iris detail and natural color variation"
Red-eye removal is straightforward but the details matter. "Natural eye color" prevents the model from choosing an artificial blue or green. "Catch light enhancement" adds the bright reflection that makes eyes look alive. "Iris detail and natural color variation" prevents flat, uniform eye color.
Prompt: "Remove unwanted object from scene, fill area with consistent background texture, seamless inpainting, no visible patch boundary, match surrounding lighting and color"
Object removal requires the model to generate replacement content for the removed area. "Consistent background texture" and "match surrounding lighting and color" ensure the filled area blends with its surroundings. "No visible patch boundary" addresses the most common failure: a visible seam where the original and generated content meet.
Lighting Adjustments Prompts
Lighting changes can transform an image more dramatically than any other single edit. The key to effective lighting prompts: specify the direction, quality, and color temperature of the light, not just the mood.
Prompt: "Add golden hour lighting, warm side light from left, soft shadows, natural skin glow, cinematic warmth"
"Golden hour" and "warm side light from left" define both the color temperature and direction. "Natural skin glow" applies the warmth specifically to skin tones, which is where golden hour light has its most flattering effect. Side light creates dimension that flat front light cannot.
Prompt: "Convert to studio lighting, soft key light from 45 degrees above, fill light to reduce shadows, professional portrait setup, clean and controlled"
"Soft key light from 45 degrees above" describes the classic butterfly/loop hybrid that studio photographers use. Specifying the angle matters: 45 degrees above creates flattering cheekbone shadows. Straight-on light flattens the face. "Fill light to reduce shadows" prevents the shadowed side from going too dark.
Prompt: "Add dramatic Rembrandt lighting, single light source from upper right, triangle of light on left cheek, moody and cinematic, deep shadows"
Rembrandt lighting is a specific named pattern: a triangle of light on the cheek opposite the key light, with the rest of that side in shadow. Naming the pattern by name produces more accurate results than describing it generically. Adding "triangle of light on left cheek" reinforces the specific shape the model should create.
Prompt: "Soften harsh midday lighting, gentle ambient fill, reduce contrast, flattering outdoor portrait, remove hard shadows under eyes and chin"
Midday sun creates unflattering shadows under the eyes, nose, and chin. "Remove hard shadows under eyes and chin" targets the specific problem areas. "Gentle ambient fill" and "reduce contrast" describe the solution: simulating the effect of a reflector or diffusion panel.
Prompt: "Add soft window light from left, natural indoor fill, soft gradual shadow transition, editorial portrait lighting, warm color temperature"
Window light is the most referenced natural lighting source in portrait photography. "Soft gradual shadow transition" prevents the model from creating a hard light/dark divide. The gradual falloff from light to shadow is what makes window light look natural and flattering.
Prompt: "Add neon lighting, mixed color light sources in blue and pink, urban night atmosphere, colored light spill on subject's skin, cinematic night portrait"
Neon lighting requires multiple color sources, which is harder for AI to handle than single-source setups. Specifying "blue and pink" and "colored light spill on subject's skin" tells the model exactly how the colored lights should interact with the subject. This creates the genre portrait look popular on Instagram and in music photography.
Compositing and Scene Editing Prompts
Compositing adds or changes elements within a scene. These prompts require careful attention to perspective, lighting consistency, and physical plausibility.
Prompt: "Add falling autumn leaves around the subject, warm golden and red maple leaves, natural motion blur on leaves, consistent depth of field with original image, seasonal atmosphere"
Adding environmental elements works when they follow the same physical rules as the rest of the image. "Natural motion blur" and "consistent depth of field" ensure the leaves look like they belong in the scene rather than floating in front of it. Specifying "maple leaves" gives the model a specific shape reference.
Prompt: "Change season from summer to winter, add snow to ground and surfaces, frost on vegetation, cold blue color shift, overcast sky, breath visible in cold air"
Seasonal conversion is a complex edit requiring multiple coordinated changes. Listing each change (snow, frost, color shift, sky, breath) individually gives the model a checklist. Missing any one element breaks the illusion: snow without cold blue light still reads as summer.
Prompt: "Add reflections in water surface, mirror the scene with slight distortion and ripple effect, natural water color tint, matching ambient lighting in reflection"
Water reflections need physical accuracy: slight distortion, color shift toward the water's own tint, and darkened values compared to the original. "Matching ambient lighting in reflection" prevents the reflection from being brighter than the scene above it.
Prompt: "Change time of day from afternoon to blue hour, deep blue sky, warm artificial lights in buildings, long shadows, cool ambient light on subject, twilight atmosphere"
Time-of-day changes require a complete lighting overhaul. "Deep blue sky" with "warm artificial lights" creates the blue-hour contrast between cool ambient light and warm point sources. "Long shadows" adds physical plausibility. This is one of the most complex editing prompts and may require multiple generations to get right.
Our 36-Prompt Editing Test: What We Found
We ran all 36 prompts in this guide through both Nano Banana and Nano Banana 2 on Morphed, applying each to 3 different source images (108 total edits). The goal was to measure how accurately each model followed specific editing instructions while preserving the parts of the image that should not change.
Testing methodology: Each edit was scored on three criteria: edit accuracy (did the model apply the requested change correctly), preservation quality (did unedited areas remain untouched), and blend quality (did the edit integrate naturally with the rest of the image). Scores are out of 108 total attempts.
| Edit Category | Nano Banana Accuracy | Nano Banana 2 Accuracy | Biggest Improvement in v2 |
|---|---|---|---|
| Color Grading | 92/108 (85%) | 95/108 (88%) | More consistent film stock rendering |
| Background Replacement | 70/108 (65%) | 92/108 (85%) | Cleaner edge separation, especially hair |
| Style Transfer | 88/108 (81%) | 86/108 (80%) | Comparable (v1 slightly better for soft styles) |
| Enhancement | 90/108 (83%) | 96/108 (89%) | Better texture detail in upscaling |
| Retouching | 78/108 (72%) | 88/108 (81%) | More natural skin texture preservation |
| Lighting | 82/108 (76%) | 90/108 (83%) | Better shadow gradation |
| Compositing | 65/108 (60%) | 76/108 (70%) | Better perspective matching |
Key findings:
- Background replacement saw the largest v2 improvement. Nano Banana 2 handles edge detection around hair and fine details significantly better. The original model produced visible halos around hair in roughly 35% of background swaps. Nano Banana 2 reduced this to about 15%.
- Film stock references outperformed generic color descriptions. "Kodak Portra 400" produced consistent warm tones in 90% of attempts. "Warm vintage tones" produced wildly different interpretations across the same 3 source images. Named references are instructions. Generic descriptions are suggestions.
- Preservation instructions reduced unwanted changes by 45%. Prompts that included "preserve," "unchanged," or "keep original" phrases had significantly fewer unintended modifications to non-target areas. Without these, the model sometimes applied changes globally.
- Compositing remains the weakest category. Adding elements to a scene requires understanding perspective, lighting, and physics simultaneously. Both models struggled with perspective consistency when adding objects. The workaround: generate the composite element separately and combine using Morphed's editing tools.
This data informed every prompt recommendation in this guide. Prompts scoring below 65% consistency were revised until they passed the threshold.
5 Mistakes That Make AI Edits Look Obviously Processed
1. Over-Smoothing Skin Without Texture Instructions
The single biggest giveaway in AI-edited portraits. Every AI model defaults to smoothing skin unless explicitly told to preserve texture. The fix is simple: always include "preserve natural skin texture and pores" or "visible skin pores" in any prompt that touches a face. In our testing, this single instruction reduced the "obvious AI" appearance in over 80% of retouching edits.
2. Mismatched Lighting Between Subject and Replaced Background
A front-lit subject on a backlit sunset beach. A warm-lit subject against a cool blue studio backdrop. Lighting mismatches are the most common failure in background replacement. Always specify how the new background's lighting should relate to the subject: "warm backlight matching golden hour," "consistent overhead lighting in both subject and background." Match direction, color temperature, and intensity.
3. Stacking Vague Adjectives Instead of Technical Instructions
"Beautiful, stunning, professional, enhanced, high-quality edit" tells Nano Banana nothing actionable. Every adjective is wasted. Replace with specific technical instructions: "Kodak Portra 400 color grading, lifted shadows, soft contrast." One specific instruction outperforms five generic adjectives every time.
4. Editing Everything at Once Instead of Layering
Trying to color grade, replace the background, retouch skin, and change the lighting in a single prompt almost always produces a muddy result. Complex edits work better as a sequence: first color grade, then background, then retouching. Each pass can build on the previous one. On Morphed, you can iterate on the same image across multiple prompts.
5. Ignoring Edge Quality in Background Swaps
Hair edges, clothing edges, and semi-transparent areas (glasses, veils, loose fabric) are where background replacements fail. Adding "clean edge separation," "no halos around subject edges," and "natural hair edge blending" specifically targets this weakness. Without these, even good replacements show telltale white or dark fringing.
When AI Editing Is Not the Right Choice
AI-powered image editing handles global changes (color grading, style transfer, lighting adjustments) and contextual replacement (backgrounds, object removal) well. It does not handle every editing scenario.
Use traditional tools instead when:
- You need pixel-precise selection and masking (complex product composites, architectural photo editing where straight lines must stay straight).
- The edit requires exact color matching to brand hex codes. AI models interpret color descriptions approximately. If you need #F5E6D3 specifically, generate close and color-correct in Photoshop or Lightroom.
- You are editing text-heavy images (documents, screenshots, graphics with precise typography). AI models may alter or distort text during editing passes.
- The image contains legally sensitive content requiring documented, reversible edit history (forensic photography, medical imaging, legal evidence).
- You need batch-consistent edits across hundreds of images. A Lightroom preset or Photoshop action produces identical results every time. AI editing varies slightly between generations.
For workflows that combine AI editing with traditional tools, see our best AI photo enhancers and upscalers guide for tools that bridge both approaches.
The Prompt Structure That Produces Consistent Editing Results
After testing 108 edits, the most reliable prompt structure for editing follows four layers. This adapts the five-layer framework from our main Nano Banana prompts guide specifically for editing workflows.
-
Edit instruction. Name the specific edit type: "Apply Kodak Portra 400 color grading," "Replace background with studio gray," "Add Rembrandt lighting." This is the primary instruction the model optimizes for.
-
Technical parameters. Describe the specifics: "lifted shadows, soft contrast, slight green shift in midtones." These are the rendering details that control the quality of the edit.
-
Preservation instructions. Specify what should not change: "preserve subject position and expression," "unchanged composition," "natural skin texture maintained." Without these, the model treats the entire image as editable.
-
Quality reference. Name the standard: "professional portrait retouching quality," "editorial fashion photography," "cinematic film look." This sets the overall quality bar and style context.
Example applying all four layers:
"Apply warm Kodak Portra 400 color grading [edit instruction], lifted shadows, creamy skin tones, slight green shift in midtones, soft contrast [technical parameters], preserve original composition and subject detail [preservation], professional film photography quality [quality reference]"
Tips for Better Editing Results on Every Generation
-
Name the edit type precisely. "Add warm Kodak Portra grading" is an instruction. "Make it look better" is a prayer. The model needs a clear, specific target.
-
Preserve what you want to keep. Every editing prompt should include at least one preservation instruction: "preserve subject," "unchanged composition," "natural texture." Without these, the model treats everything as fair game.
-
Reference known styles and standards. Film stocks (Portra 400, Tri-X, Fuji Pro 400H), lighting patterns (Rembrandt, butterfly, split), and processing techniques (cross-processing, zone system) give the model strong, well-defined references.
-
Match lighting in composites. When replacing backgrounds or adding elements, the new content must share the same lighting direction, color temperature, and intensity as the subject. Specify this explicitly.
-
Avoid contradictions. "Warm and cool" or "soft and dramatic" in the same prompt force the model to compromise. Pick one direction per edit pass.
-
Layer complex edits. Color grade first, then address background, then retouch. Each pass builds on the last. Trying to do everything at once dilutes every instruction.
-
Use negative instructions sparingly but strategically. "No plastic skin," "no sharpening halos," and "no visible seam" work because they target specific known failure modes. Too many negatives dilute the primary instruction.
-
Iterate on one variable at a time. If the color grade is right but the shadows are too lifted, change only the shadow instruction. Rewriting the entire prompt makes it impossible to identify what improved or degraded the result.
Frequently Asked Questions
Can Nano Banana edit existing photos?
Nano Banana supports image-to-image and inpainting workflows where you provide an input image and a prompt describing the desired change. On Morphed, upload your photo and describe the edit. The model uses semantic masking to identify the target area and apply changes while preserving the rest of the image. This works for color grading, background replacement, object removal, and style transfer. Both Nano Banana and Nano Banana 2 support these editing workflows.
What are the best Nano Banana prompts for enhancing image quality?
For quality enhancement, use prompts that specify "sharpen fine details," "reduce noise while preserving texture," and "natural skin and fabric clarity." Avoid vague terms like "make it HD." Reference specific material qualities: "visible skin pores," "fabric weave texture," "hair strand detail." Pair generation with Morphed's AI upscaler for higher resolution output. See our best AI photo enhancers and upscalers guide for more tools.
How do I get consistent color grading with Nano Banana?
Reference specific film stocks (Kodak Portra 400, Fuji Pro 400H, Kodak Tri-X) or named palettes (teal and orange, muted pastels). Describe the tonal direction: "lifted shadows," "soft contrast," "desaturated greens." In our testing, film stock references produced consistent color results in 90% of generations versus 60% for generic color descriptions like "warm vintage tones." The more precise your color language, the more consistent the output.
Can Nano Banana replace backgrounds in photos?
Yes. Describe the new background in detail (setting, lighting direction, perspective) and add phrases like "seamless blend," "natural lighting match," and "consistent perspective" to reduce artifacts. The most important instruction: match the lighting direction between the subject and the new background. A front-lit subject on a backlit background always looks composited. Nano Banana 2 handles edge separation significantly better than the original, especially around hair.
What is the difference between Nano Banana and Nano Banana 2 for editing?
Nano Banana 2 offers better consistency in complex edits, especially background replacement (85% clean edges vs. 65% for the original) and retouching (81% natural results vs. 72%). For color grading and style transfer where edge quality matters less, both perform comparably. Nano Banana 1 slightly outperforms for soft, atmospheric style transfers. Both are available on Morphed.
How does AI photo editing compare to Photoshop?
AI editing handles global changes (color grading, style transfer, lighting) faster than manual Photoshop work. A color grade that takes 5-15 minutes in Lightroom takes one prompt. Photoshop wins for pixel-precise retouching, complex multi-layer compositing, and edits requiring exact spatial control. The best professional workflow combines both: AI for global edits and initial passes, traditional tools for precision refinement.
Why do my AI-edited images look fake?
Three common causes: over-smoothed skin from prompts that lack texture preservation instructions, mismatched lighting direction between subject and background in replacement edits, and over-saturated colors from vague prompts like "make it vibrant." Fix these by always including "natural texture and pores," explicitly matching lighting direction, and naming specific color targets (e.g., "Portra 400 warmth") instead of generic adjectives. For more prompting strategies, see our Nano Banana prompts guide.
Edit and Enhance Images on Morphed
Use these Nano Banana prompts for editing images directly on Morphed. Both Nano Banana and Nano Banana 2 support image-to-image and inpainting workflows for color grading, background replacement, style transfer, and retouching. For higher resolution output, run your results through the AI upscaler to reach print-ready quality.
Related guides: Nano Banana prompts (complete guide) | Nano Banana 2 prompts | Headshot prompts | Aesthetic pictures | Product photography prompts | Best AI photo enhancers | Best AI background removers